Showing posts with label christmas. Show all posts

Tuesday, December 10, 2013

Holiday Organizer II

Right around this time last year, I posted about the handy organizer I made to keep myself on track for Christmas. You can find it here.

Well, this year I have something even better! WAY better! I have been using it daily since I discovered it. It is the most wonderful app in the world, called "Santa's Bag".  It is available for FREE in the App Store, so go and download it now!

Santa's Bag is a place where you can save lists for each person you are buying for, enter costs & budgets, track whether your gifts are wrapped, and more awesome things! For me that means no more scraps of paper & notebooks full of lists! (Or at least FEWER scraps of paper & notebooks! I don't think I'll ever get rid of those entirely!) But there's also no more searching to find where I left the lists...it's all in my phone. :)

Here's a peek at Santa's Bag:


These are just a couple of the screen shots with information changed to protect the innocent (sorry Mom, you may not actually be getting wine, cheese & chocolate!)

The icons next to each item on the list indicate whether the item is an idea, something you need to purchase, or something you've already purchased. You can even mark items as "wrapped" when you're all done!

Overall, I think it's a really helpful app & I plan to use it throughout the year!


Thursday, November 21, 2013

Silver Christmas Trees

As promised, here are some pictures of the silver Christmas tree candle holders I refinished! While they certainly don't look "brand new" by any means, they look much better than before.


The bases were probably the worst part, and I think those turned out really well.  The part where the actual candle will sit didn't come out quite as nice.


Since I didn't have any silver cleaner product at home, I decided to look online for ways to clean silver. Some of them were just gross (cover it with ketchup & wipe off - yuck! I don't really want the scent of ketchup every time I light a candle!) and some were just too much work. I finally tried a combination of two different ideas. 


First I combined a liter of water with 2 tablespoons baking soda in a pan, and threw in a piece of aluminum foil. After the water was boiling, I dipped in each piece of silver for 10 seconds. It helped, but not as much as I hoped. I tried dipping them for a bit longer, but still not much difference. 

The second thing I tried was a paste of baking soda & water. I rubbed this on the silver pieces and it did take a lot of the tarnish away. I was pretty satisfied with the results, so I stopped making any more mess after that & called it good!

I am also making some progress on the Retro Tree (although my family has informed me that the tree can't be officially "decorated" until after Thanksgiving.) So far I have lights and just got some more new ornaments that I'm very excited about.


These are some Christopher Radko "Shiny Brite" ornaments I found at Menard's, which claim to be a "Vintage American 1940's design"...since I wasn't around in the 1940's, I'll have to take their word for it! But I think they are very cool, and will look nice with my lights & other ornaments on the Retro Tree! I'll hopefully be sharing the end result soon (but after Thanksgiving!!)


Sunday, November 17, 2013

A "New" Decoration


Last week I showed you my thrift store Christmas finds, and I just wanted to give a quick update. The brass candle holder/centerpiece was pretty tarnished when I bought it (for less than a dollar!) But I knew I could clean it up. It now has a new home & is looking great!


For now I have my "branch" candlesticks in the holder, but that could change.

I actually made a 2nd trip to the thrift store and found another great deal (more on that one later) but I also found these silver Christmas tree candle holders. They are pretty rough looking now, but I'm hoping to get them cleaned up, too!


Stay tuned to see how they turn out!!


Thursday, November 14, 2013

Christmas Reading

I forgot to include this in my post yesterday. This is a cute idea I saw while visiting the thrift store for my retro decorations...


If I worked in a library, I would definitely do it. In my home, probably not. But it's still very cute!

Wednesday, November 13, 2013

It's a Retro Christmas

Don't fall over from shock, but this IS an actual Christmas post. I know it's a little early, but lately I've been doing some planning in my head for my "new" Retro Tree. (You may remember that I purchased a tree after Christmas last year that I'm now designating as my Retro Tree).

Today I found some items for the tree at a local thrift store. Not as many as I hoped for, but I do like them & think they'll fit with my theme. I'm also not sure that they are truly retro but that's okay too. My personal criteria to define retro is something that comes in a package that does NOT list a website. I figure the item must be at least 20 years old without a website on it somewhere!

Here are a couple bead strands I found...I'm not sure how well they will show up on the tree, but I thought it was neat, and the price was right!


These glass ball ornaments are just the right size - my tree isn't very big, so some of the larger balls are just too much for it. I think the colors will also go well with the painted ornaments my great-grandmother made (now those really ARE retro!)


The last item I got (and probably my favorite) was this brass candle holder. I think it is made for one of those huge pillar candles (which I don't have), but what I'll probably do is look around for some other way to use this, maybe with a vase or some other Christmas item I already have. Also its not really retro (and it definitely isn't for the tree), but I thought it was very cute, and with a little clean-up & brass polish it should look fantastic!


Total cost for all three things was $1.42!! I love paying "retro" prices for my Retro decorating! I hope to put the tree up this weekend to see how everything looks, and then I can work on it throughout the Christmas season. It will definitely be a work in progress :)

Saturday, December 8, 2012

New Advent Tradition?

Thanks to Pinterest, I came up with a new idea for our Advent calendar. I found a link to a "joke-a-day" for the month of December. I thought there must be some way to put this information to use, and who doesn't need a good laugh every day? Although I didn't end up using all the jokes from the original site I found, I did search for a few more and came up with some that I thought my kids would like.


I usually give my kids a few "bigger" gifts throughout Advent (and by bigger I mean like a pack of gum, some stickers, or a new ornament for the tree). But on those in between days when the gifts aren't so exciting (a quarter or an Andes mint!) I decided to stick a little joke in the pocket for them.


So far it seems to be a big hit. Here are a few of the jokes that will be tossed around at our house this month...

What's the difference between the Christmas alphabet and the real alphabet?
The Christmas alphabet has No-El

How much did Santa pay for his sleigh?
Nothing. It was on the house.

How do you scare a snowman?
Bring out a hair dryer!

What is an "ig"?
An eskimo house with no loo.

What do you call a snowman in the summertime?
A puddle.

What does Santa use to clean his sleigh?
Comet.

And being the grammar geek that I am, here is my personal favorite:

What did Adam say on the day before Christmas?
It's Christmas, Eve!


Monday, December 3, 2012

Rustic Christmas Centerpiece

Christmas decorating is well underway at my house...here's a look at my "new" dining room centerpiece.


One of my favorite blogs, Inspired by Charm, was the inspiration (hee hee) for this centerpiece. I noticed in a recent post that Michael had what looks like an old wooden tool box on his dining room table. I thought it was such a good idea, I decided to try it myself. And lucky for me, I just happen to have an antique tool box laying around the house, too! 


We picked this up at a flea market last year, and it has been sitting on my dining room floor as a "shelf" ever since. I started with the tool box and a few of my favorite decorating accessories...my tree branch candlesticks (complete with battery-operated votives.) These seem to be incorporated with just about every holiday decoration at my house!


I added some garland, glitter pinecones (from a craft LAST Christmas!) and red balls...so easy! The one drawback is that it doesn't leave much room for eating. But luckily that's something we don't do too often in the dining room! (I know, weird!)


By the way, this tool box weighs A TON. As the flea market guy pointed out, whoever carried this thing around (full of tools!) must have had some killer biceps!


I think it turned out pretty well...even the husband commented on how cool it looked! :)

You can see the post that was the inspiration for my centerpiece here on Inspired by Charm. (Which is awesome, by the way!)

Happy Decorating, everyone!!


Saturday, December 1, 2012

Christmastime Pinterest Picks

If you're like me, I'm sure you are pinning like crazy all the things you want to do for Christmas. Here's a look at some of my new favorite things...we'll see in January how many I actually accomplish this holiday season!!

First up are these "Countdown to Christmas" blocks from Two Yellow Birds Decor:


These are so cute...although I'm sure the numbers would never change fast enough for the kids around my house!


Another project with wood is this monogram Christmas tree ornament from Two Peas in a Bucket.  What a great gift idea!!


Here's a super cute ruffled tree skirt from The Crafted Sparrow


I really like the ruffled look, and she has a great tutorial on her blog!


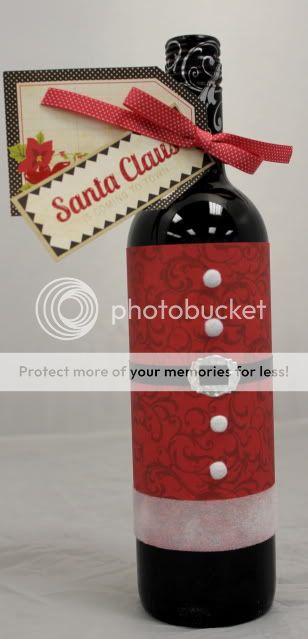
Here's a cute idea for decking out your wine bottles this Christmas season


I didn't even realize until I started my post that it comes from a store called A Walk Down Memory Lane, located right in Rock Valley, IA!


I think I've made something like this next one before, and I can say for sure that it smells AMAZING!  I'll definitely be trying out this recipe from Make It Do soon!


And speaking of recipes, these Candy Cane Chocolate Bars from Yesterday on Tuesday really make my mouth water! I can't wait to try some!


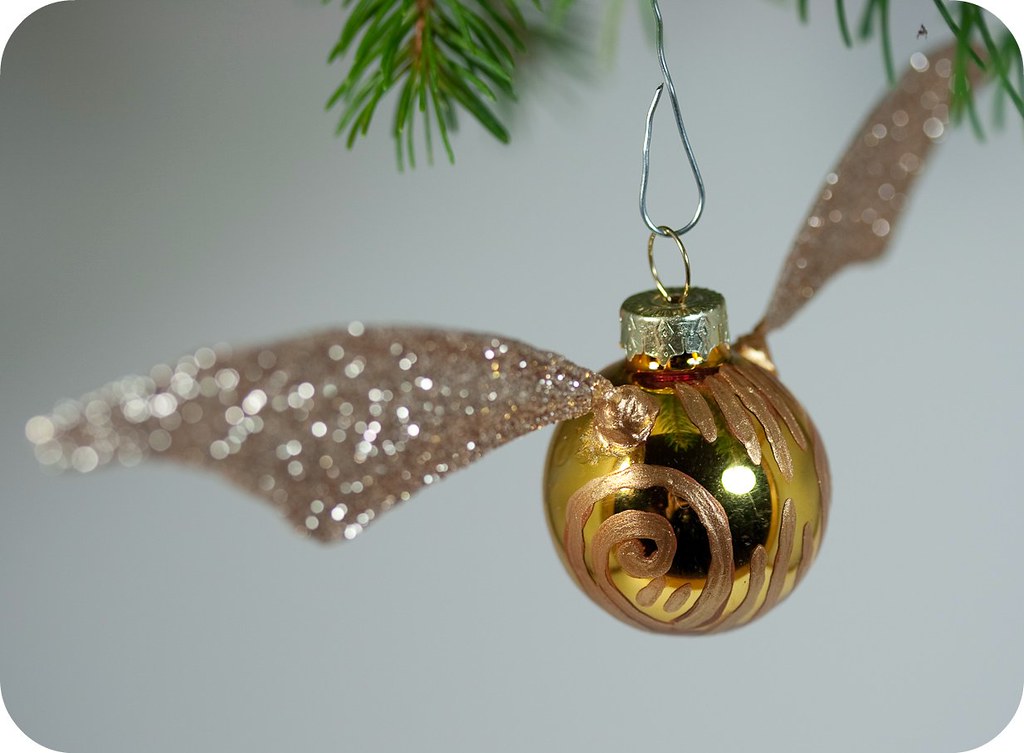
And of course...for the Harry Potter fan on your list, who could possibly resist this Golden Snitch ornament from Tiny Apartment Crafts! Awesome!!!


So far these are the things I'm excited to try out for Christmas...but it's still early, I'm sure there will be more!!


Monday, November 26, 2012

Holiday Organizer

I'm sure everyone out there has been asking the same question...but I'll ask anyway. Are you ready for Christmas?

Let me start off by saying, I'm NOT one of those ultra-organized people who buys all their gifts and wraps them all by the end of Thanksgiving weekend. (OK, if you know me really well, you can get up off the floor and stop laughing now!) Nor do I calculate down to the last penny how much I've spent on each individual, making sure that everything is exactly equal. 

But I am a total list-maker. I could probably pull out my purse right now & find at least 3 different lists...groceries, "to-do's," recipes, you name it. And I know at this time of year, there are a ton of store coupons, sale flyers, etc. 

So to help myself stay a little more organized for Christmas, I made this nifty little Holiday Organizer. Yay Me!!


I just used a red composition notebook and added some pockets & tabs to the pages.


Pocket for coupons - very important!!


Calendar page...also a key item


Receipt pocket...just in case


Tabs along the side for:

To Do Lists
Recipes/Crafts
Gift Lists

So now I can breath a sigh of relief knowing I'm a little bit more organized for Christmas! Whew! 


Linked to these great blogs!!


UPDATE: A big thank you to Lanaya at Raising Reagan for featuring the Holiday Organizer! Go check our her blog here:

Feature Fridays


Friday, December 30, 2011

Easy Treat Recipes!

As promised, here are the recipes for the EASY, YUMMY Christmas goodies I made last week. They would be good for a New Year's party or any time of the year! Enjoy!

Italian Lemon Drop Cookies (Recipe from Crisco)

Dough:
 
No-stick cooking spray
2 cups flour
1/2 cup sugar
1 Tbsp. baking powder
1/4 stick Crisco baking sticks OR 1/4 cup Crisco shortening
1/2 cup milk
1 large egg, beaten
2 tsp. lemon extract
 
Frosting:
 
2 cups powdered sugar
1/3 stick Crisco baking sticks OR 1/3 cup Crisco shortening
1/4 cup warm milk, divided
1 tsp. lemon extract
 
Heat oven to 375. Spray baking sheet lightly with no-stick spray.
 
Combine flour, sugar and baking powder in large bowl. Beat in shortening with electric mixer on low speed until completely blended into flour mixture.
 
Add milk, egg and lemon extract, mixing until just blended.
 
Roll dough into 1-ince balls.  Place 1 inch apart on prepared baking sheet.
 
Bake 10 to 12 mins. or until lightly browned. Cool completely on baking sheet on wire rack.
 
For Frosting:
 
Beat powdered sugar, shortening, 2 Tbsp. warm milk and lemon extract in medium bowl with electric mixer on low speed until blended. Gradually beat in additional warm milk (I didn't use much more than the 2 Tbsp.) until desired consistency. Spread on top of cookies.
 
 
Rolo Truffles:
 
Mini Pretzels
Rolo candies
Pecan halves
 
Place pretzels on baking sheet with one Rolo on top of each.
 
Heat at 250 for 4-5 minutes (candy will be shiny, but not melted)
 
Place 1 pecan half on each Rolo and gently push down.
 
Cool to room temperature, then cool completely in fridge or freezer.
 
 
"Thin Mint" Cookies
(Recipe from Food.com)
 
Chocolate Cookies:
 
1 (18.25 oz.) package fudge cake mix
3 Tbsp. shortening, melted
1/2 cup flour, measured then sifted
1 egg
3 Tbsp. water
No-stick cooking spray
 
Cookie Coating:
 
(I modified this & just used one package melted Andes mint chips) BUT, here's the original recipe:
 
3 (12 oz) bags semi-sweet chocolate chips
3/4 tsp. peppermint extract
6 Tbsp shortening
 
Combine cookie ingredients in large bowl, adding the water a little at a time until dough forms.
 
Cover and chill 2 hours.
 
Preheat oven to 350.
 
On lightly floured surface, roll out a portion of the dough to just under 1/16 of an inch thick.
 
To cut, use a lid from a spice container with a 1 1/2 inch diameter.
 
Arrange the cut dough rounds on a cookie sheet that is sprayed with a light coating of no-stick spray.
 
Bake for 10 minutes.
 
Remove wafers from the oven and cool completely.
 
Combine chocolate chips, peppermint extract & shortening (or Andes mints only) in large microwave-safe bowl.
 
Heat for 1 minute and stir gently. Continue to heat at 15-second intervals if necessary until melted.
 
Use fork to dip each wafer in melted chocolate. Tap the fork on the edge of bowl to drain excess chocolate.
 
Place cookies on wax paper lined baking sheet & refrigerate until firm.

Saturday, December 24, 2011

Christmas Tour

WARNING: PHOTO OVERLOAD!

Since I've been a little overwhelmed with getting ready for Christmas (I'm pretty sure this year is the slowest I've been for a LONG time!) I thought I'd do a quick "Christmas tour" of our house. This isn't everything - I have a really hard time getting a good picture of the tree! So...minus the tree, here are a few of my favorite Christmas things.....


Our Mantel

Collection of homemade Christmas pillows


Wooden JOY letters from last year - you can see the post HERE


Eat Sleep Craft ornament I made for my crafty sister (Hope she's not reading this today!)


"Long Santa"


The little tree inside our front door (this one is easy to photograph!)


Snow Village Houses


More Snow Village Houses


Snow Village House & Daughter's Nutcracker collection


Snow Village "Graceland" (Did I mention we have a bit of a Snow Village addiction at our house?)


I promise the Snow Village train is the last one! (With Daughter's art project peeking out behind!)


Little button tree ornament made by my son when he was about 4!


Christmas Wine - See my post about printable labels HERE


I also made some new treats this year - all of these are super easy and I'll share the recipes next week.

Italian Lemon Drop Cookies


Homemade "Thin Mints"


Rolo Truffles


Everything smelled sooo good when we were baking - someone couldn't wait to get one!


            Merry Christmas and Happy New Year to all of you!